Causes of Shin Splints
Shin Splints are usually caused by excessive tensile overload (muscle pulling on the shin bone), such as a sudden increase in running volume or intensity (e.g. running on hills and/or hard and uneven surfaces). Other factors include glute weakness, restrictions and/or weakness in calf muscles, ankle dorsiflexors, arches, and posterior tibialis.
A. Volume or Intensity Increase
Tissue takes time to adapt and get stronger, so if you persistently push it beyond its limits of recovery then you will get shin discomfort or injury. This not only occurs from increasing intensity too quickly in training, but also from doing too much too soon after having taken time off, such as for travel, injury, or sickness, during which the tissue has weakened from inactivity.
QUESTIONS:
- Did I recently change my running program?
- Do I allow adequate rest in my running program?
- Do I participate in other activities that may be overloading the shin?
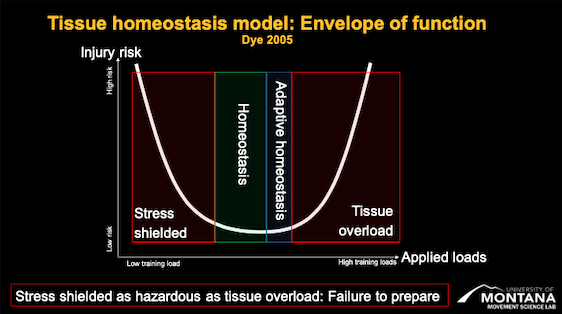
This “U” shape graph indicates Injury Risk (Vertical/ Y-Axis) and Load (Horizontal/ X-Axis). If you don’t train much (low load), your risk of injury is high due to the low resilience of the tissue. If you are training a lot, your risk for injury is also high due to potential overload. The middle zone provides the lowest risk of injury. To increase load capacity, you will have to move toward the higher load zone, but the key is to do so progressively to allow the tissue to adapt. This will be addressed further in the conditioning and training portions of ARC Running.
B. Glutes
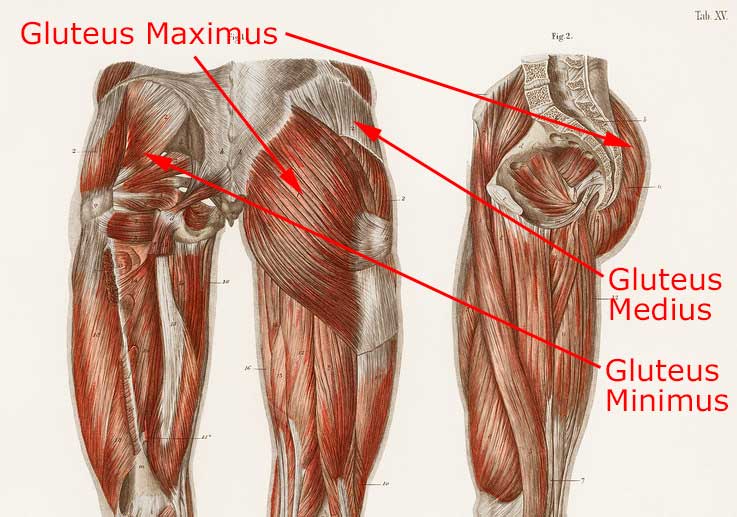
With every step, and thereby every load on our legs, the glutes are active in preventing the knee from caving inwards and increasing pronation at the ankle. If the knee collapses too much or there is a delay in firing of the glutes, then the ankle will likely overpronate, increasing strain on the tibialis anterior and posterior tibialis.
ASSESSMENT TESTS:
Side Planks
If you can hold for 90 seconds, you are good. Less than 90 seconds indicates weakness in the side of the hip, as does trunk rotation or dipping hips that break your initial position.
Instructions: Elbows aligned with shoulders, come up on your side. Keep your body straight throughout the duration of the test. The test is complete when your hips begin to drop, you begin to rotate, or you get too tired to continue.
Single Leg Glute Bridge
If you can hold for 60 seconds, you are good. Less than 60 seconds indicates weakness in the glutes, as does an inability to maintain a level body/ hip height and/or experiencing trunk rotation while trying to maintain the position.
Instructions: On your back, bring your hips up with arms across your chest. Hold your body level throughout the duration of the test. The test is complete when your hips begin to drop, you begin to rotate, or you get too tired to continue.
Single Leg Squat
Can you squat without the knee wobbling or caving inward? Excessive knee movement or inability to reach a 90-degree squat indicates hip/leg weakness or motor control deficits.
Instructions: On one leg, begin to squat down by bringing your hips back and then bending your knee. Look to see if the knee is aligned with the middle of your foot throughout the duration of the movement.
Running Assessment
When you run, do your legs run parallel or cross a midline? If your leg crosses your body excessively (across midline), this can indicate that more pressure is being placed on your knees from your running form.
Instructions: Notice yourself by using a track. Do your feet cross the midline when you run? (A friend may be able to see this better than you.)
C. Calf Strength
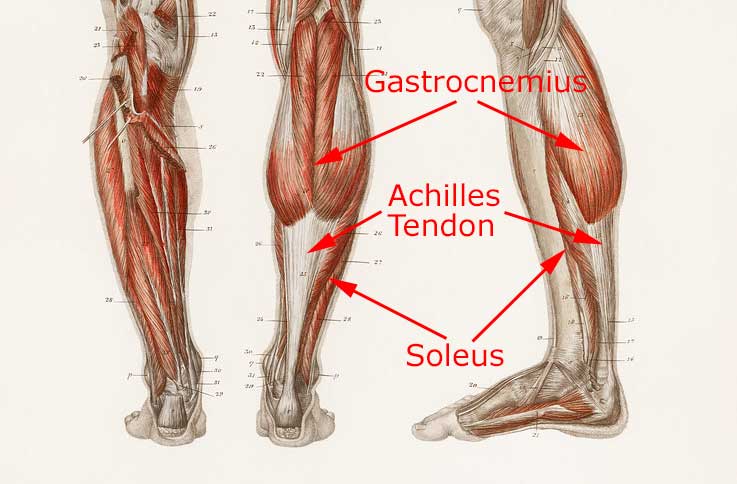
Weakness in the calves may contribute to increased strain on the anterior tibialis and/or soleus, causing more stress on the tibia as well as less control. The calf muscles (gastrocnemius and soleus) absorb significant forces during running, so if the calf is not strong then you are more prone for shin splints.
ASSESSMENT TESTS:
Ideal is 25 reps or until fatigue (stop if too painful):
Gastrocnemius: Standing on a step with heels off the edge, bring yourself up and down on your toes while keeping your knees straight. Go up and down to the same level each time. If you start to fatigue or can’t get as high, then stop the test.
Soleus: Standing on a step with your heel off the edge and your knee bent, bring yourself up and down on your toes, keeping your knee bent the whole time. Go up and down to the same level each time. If you start to fatigue or can’t get as high, then stop the test.
D. Calf Flexibility
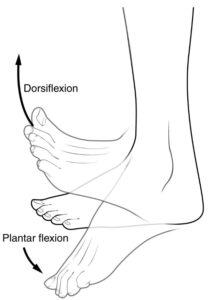
Ankle dorsiflexion is the ability of the ankle to flex (bend up toward the shin), while plantar flexion is its ability to extend (bend backwards away from the shin). Weak plantar flexion (calves) and restricted dorsiflexion, most evident with foot strike during running, will affect the biomechanics of the ankle. If you have restrictions in dorsiflexion because of calf tightness, it will cause your ankle dorsiflexors (anterior tibialis) to work harder to overcome the force of your calves.
ASSESSMENT TESTS:
Dorsiflexion:
Can you dorsiflex your ankle 20 degrees? Test this by kneeling forward, seeing how far your knee comes over your toes. It should be at least 3 inches over your toes.
Calf Flexibility:
For the gastrocnemius, can you stand and lean forward, with your back knee straight and toes facing forward. The goal is to be able to have your knee in front of your toes with minimal to moderate pull about 5 inches beyond your toes.
E. Arches
With each foot strike, the foot receives the initial force (i.e. stress) of impact, making the arch one of the first points of “shock absorption”. Without a strong arch, the stress shoots immediately up to the tibia. That is assuming you are landing on the forefoot (See Principles of Running); heel striking has even more devastating consequences, including reducing the potential for speed and economy.
ASSESSMENT TEST:
Arch Stability:
Think of your sole as having three key points of contact with the ground: two points on the ball of the foot and one at the heel. Stand with your feet shoulder-width apart and lift up all your toes, maintaining those three points of contact. When you relax from this position, watch to see if your inner ankle collapses down significantly. If so, that may indicate weak arches.
Note: This test references the first half of the video, which demonstrates an arch strengthening routine that will be explored more specifically in the rehab and conditioning phases.
F. Anterior/Posterior Tibialis
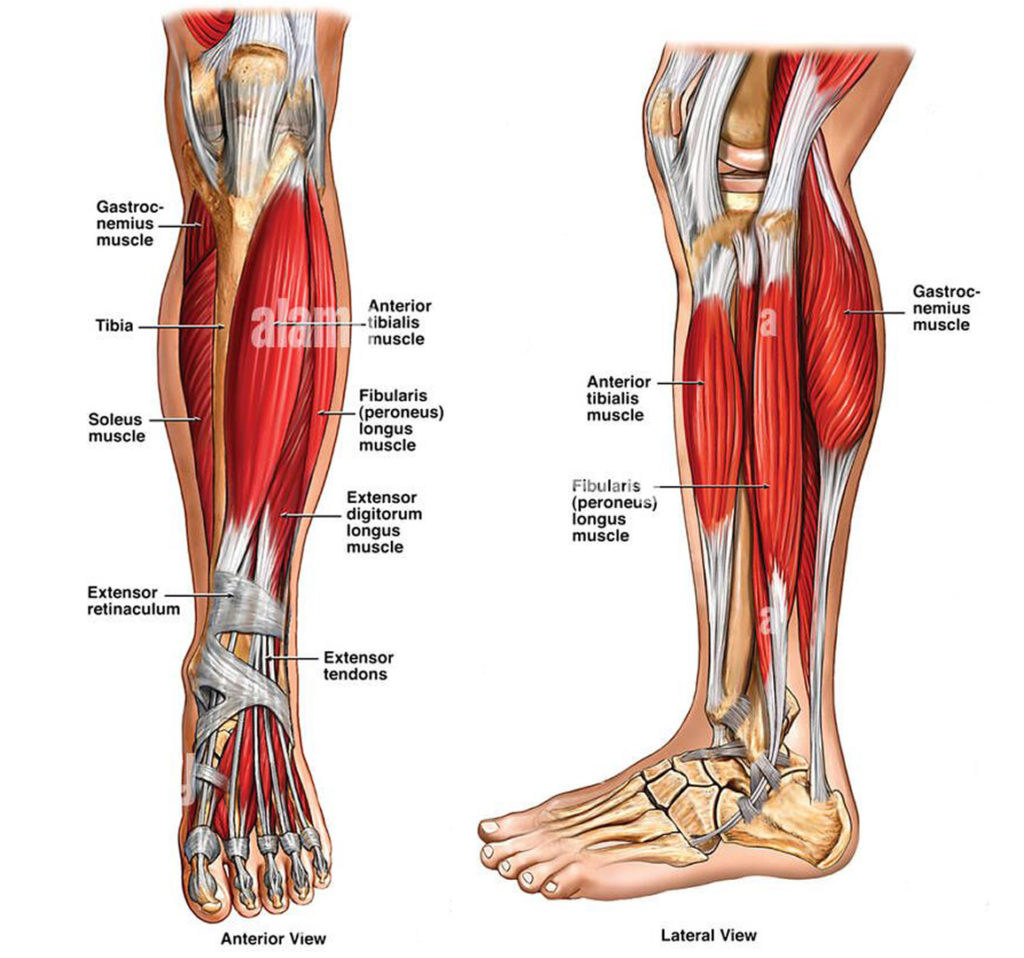
The posterior tibialis muscle (under/behind the anterior tibialis) helps control the arch during stance, in turn helping control the amount of pronation (arch caving in) as you load your ankle while running. Weakness and/or excessive pronation can strain the anterior tibialis and/or soleus muscles. Some feet may have a naturally lower arch, but strengthening the muscle will help bolster ankle stability.
ASSESSMENT TEST:
Posterior Tibialis Muscle Recruitment:
Standing on a single leg, are you able to bring your arch up off the ground with toes and heel on the ground for 30 seconds? This test gives some indication of the recruitment and endurance of the tibialis posterior. Defer if too painful.
G. Other Risk Factors
- Prior Injury: Not having fully recovered and/or strengthened weakened area(s).
- Training Dynamics: Different running surfaces, speeds, and distances.
- Sleep, Nutrition, and General Recovery: If you don’t eat well, your tissues don’t have the fuel needed to restore muscle.
- Hard/Uneven Surfaces when running
- Poor Footwear: Decreased shock absorption
Still Need Help?
You are welcome to meet virtually with our PT for additional feedback and assessment. Otherwise, continue to the next step to learn how best to manage the pain from your injury.